
Tarpon, one of sport fishing’s most prized catches, can exceed 280 pounds and survive for up to 80 years in the wild – but only if you handle them correctly. You’ll find these prehistoric giants particularly vulnerable to mishandling, with research showing that improper release techniques can lead to up to 40% post-release mortality. Understanding the science-backed methods for catch and release won’t just preserve the species; it’ll guarantee future generations can experience the thrill of the silver king’s spectacular aerial displays.
- Key Takeaways
- Essential Gear for Safe Tarpon Release
- Proper Hook Selection and Placement
- Fighting Techniques to Minimize Stress
- Water-Based Handling Guidelines
- Air Exposure Time Management
- Reviving Exhausted Tarpon
- Photo Opportunities Without Harm
- Shark Awareness and Safety Measures
- Seasonal Considerations for Release
- Size-Specific Handling Requirements
- Location-Based Release Strategies
- Common Mistakes to Avoid
- Frequently Asked Questions
- Conclusion
Key Takeaways
- Use barbless circle hooks and limit fight time to minimize stress and injury during capture.
- Keep the tarpon’s gills submerged in water and limit air exposure to less than 30 seconds.
- Support the fish horizontally and use rubber gloves while handling to prevent damage to protective slime coating.
- Revive exhausted tarpon by moving them forward in water until normal gill movement resumes.
- Cut the line near deeply-set hooks rather than attempting removal, and release immediately if sharks appear.
Essential Gear for Safe Tarpon Release
When targeting tarpon, proper gear selection is imperative for both successful catches and safe releases. While fishing for tarpon, you’ll need nonstainless, nonoffset, barbless circle hooks to minimize injury and guarantee quick releases. Your rod setup should include medium to extra heavy rods paired with 5,000-10,000 series reels capable of at least 12 pounds of drag to effectively control these powerful fish.
To handle the fish safely, equip yourself with a fighting belt or chair to manage their substantial weight during the battle. Keep a long-handled dehooking tool readily available for efficient hook removal while minimizing contact. Always maintain clean, wet hands or use rubber gloves when touching tarpon to protect their essential protective slime coating, which is critical for their post-release survival.
Proper Hook Selection and Placement
When targeting tarpon, you’ll achieve ideal results by using nonstainless, nonoffset, barbless circle hooks instead of traditional J-hooks, as they minimize injury and promote efficient corner-mouth hook placement. Single hook rigs outperform treble hooks by reducing gut-hooking incidents and facilitating easier hook removal during the release process. Circle hooks, paired with appropriate tackle ranging from 5,000 to 10,000 series reels, guarantee proper mouth placement and increase post-release survival rates compared to other hook configurations.
Circle Hooks vs. J-Hooks
Selecting the right hook type can greatly impact your tarpon’s survival rate during catch-and-release fishing. Research demonstrates that circle hooks markedly reduce deep hooking incidents by up to 90% compared to traditional J-hooks, as they’re engineered to turn naturally in the fish’s mouth.
When you’re using bait, opt for non-offset, barbless circle hooks to minimize injury and facilitate easier hook removal. You’ll want to guarantee proper hook placement at the corner of the mouth, which is vital for successful release. While J-hooks remain popular among some anglers, they often result in deeper hook sets that can severely harm the fish and decrease post-release survival rates. By choosing circle hooks and positioning them correctly, you’re actively contributing to tarpon conservation while maintaining effective catch rates.
Single Hook Rigging Benefits
Three key benefits make single hook rigging the ideal choice for tarpon fishing: reduced injury rates, faster release times, and improved fish survival.
When you use a single hook rig, you’ll greatly minimize tissue damage since barbless, non-offset circle hooks are designed to catch in the corner of the mouth. This positioning reduces the risk of deep hooking, particularly essential when fishing with live or natural bait. You’ll also spend less time removing the hook, which decreases the physiological stress on the tarpon during release.
In regulated areas like Boca Grande Pass, you’re required to use single hooks instead of treble hooks to protect the species. This setup helps you better handle the fish during the fight and release process, maximizing control and enhancing post-release survival rates.
Hook Removal Best Practices
Proper hook selection and placement serve as the foundation for successful tarpon catch and release. You’ll need to use non-stainless, non-offset, barbless circle hooks to minimize tissue damage and enhance post-release survival rates. These specific hooks markedly reduce the occurrence of deep hooking when properly positioned in the tarpon’s jaw.
When implementing hook removal best practices, you’ll want to assess the hook’s location immediately. If the hook is accessible and shallow-set, remove it promptly. However, if you encounter a deeply embedded hook, don’t attempt forceful extraction. Instead, cut the line as close to the hook as possible. This approach prevents additional trauma to the fish. Remember to use single hook rigs with live bait, as multiple hooks complicate removal and increase handling time.
Fighting Techniques to Minimize Stress
When fighting a tarpon, employing the correct techniques is essential for minimizing stress on both the fish and your equipment. You’ll need to point your rod tip directly at jumping fish to reduce line strain and prevent breakage. During the fight, utilize your rod’s backbone while making short, controlled turns of the reel to manage powerful runs effectively.
If you’re handling the fish from a boat, position yourself at the bow when the tarpon attempts to move underneath or around the vessel to prevent line tangles. Using properly matched tackle helps reduce fight times, which is vital for the tarpon’s survival. Stay alert for sharks in the area – if you spot them, quickly bring the fish to the boat and cut the line near the hook, allowing the tarpon to escape safely.
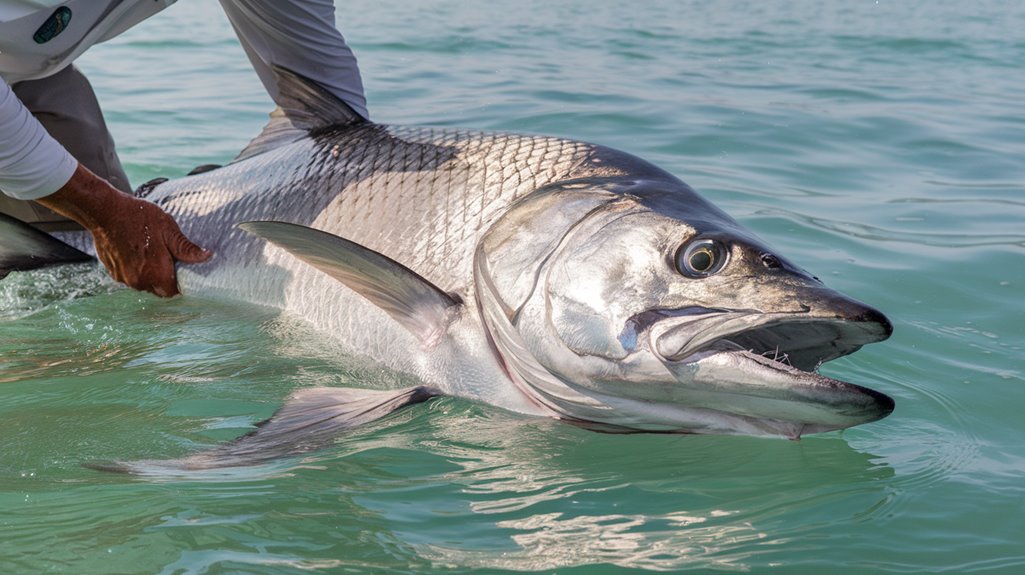
Water-Based Handling Guidelines
Safe handling of tarpon in the water requires strict adherence to established guidelines that protect both the fish and angler. When handling the fish, you’ll need to keep its gills submerged while wearing rubber gloves to grip the lower jaw. Never touch the gills, as this can cause severe injury to the tarpon.
To properly release tarpon, maintain horizontal positioning while supporting their belly. This approach prevents internal organ damage and maintains the protective slime coating. Don’t drag the fish across boat surfaces or gunnels. If your tarpon shows signs of exhaustion, you’ll need to revive it before release by ensuring water flows through its gills. This revival process is critical for their survival, especially after an extended fight.
Air Exposure Time Management
You’ll need to limit a tarpon’s air exposure to under 30 seconds to maximize its survival chances and reduce stress levels during handling. When photographing, position your camera and supports beforehand, then keep the tarpon horizontal with its gills in the water to maintain proper oxygen flow. Watch for signs of labored breathing or lethargy, which indicate excessive air exposure and require immediate submersion while moving water across the gills until the fish regains strength.
Minimize Time Above Water
Since tarpon are highly susceptible to stress from air exposure, keeping them out of water for less than 30 seconds is critical to their survival. To minimize fight time, prepare your camera settings and coordinate with your fishing partners before lifting the fish. When holding the fish, utilize a long-handled dehooking tool to remove hooks while keeping the tarpon partially submerged.
Maintain the tarpon’s respiratory function by ensuring its gills remain underwater during the release process. If you need to photograph your catch, do so swiftly and return the fish to the water immediately. For exhausted or stressed tarpon, support them in the water, allowing water to flow through their gills until they regain strength. This revival technique helps prevent post-release mortality and increases their chances of survival.
Quick Photo Best Practices
Taking memorable photos of your tarpon catch requires precise preparation and execution to minimize stress on the fish. Before you lift the tarpon, verify your camera settings are configured and your photographer is ready to capture the quick photo.
When photographing, hold the tarpon horizontally with only half its body lifted from the water. Support its weight by cradling the belly and head while avoiding contact with the sensitive gill area to protect its essential slime coating. Don’t suspend the fish vertically, as this can damage its internal organs.
Your goal is to release tarpon within seconds of taking the photo. This rapid execution maximizes the fish’s survival chances by preventing exhaustion and minimizing air exposure. Keep the tarpon partially submerged throughout the process to maintain its oxygen supply.
Watch Breathing Response
Monitoring a tarpon’s breathing response during handling requires careful attention to air exposure time and respiratory signs. When handling these fish, you’ll need to closely observe their gills and overall behavior to guarantee their survival.
Key steps to monitor breathing response:
- Keep gills submerged whenever possible to maintain oxygen flow and prevent respiratory distress
- Limit air exposure during photographs, especially for tarpon over 40 inches
- Position the fish to allow water flow from front to back across gills when reviving
- Watch for signs of lethargy or inability to swim upright, which indicate respiratory stress
If you notice the tarpon struggling to maintain proper breathing response or showing signs of distress, immediately return it to the water and begin revival procedures. Your quick action can greatly impact the fish’s survival rate.
Reviving Exhausted Tarpon
After landing a tarpon, proper revival techniques are vital for ensuring its survival. Keep the fish’s head submerged and move it forward consistently to facilitate water flow across its gills for proper oxygenation. If you notice the tarpon displaying signs of lethargy or struggling to maintain an upright position, use your boat’s motion to create a beneficial current that will stimulate its respiratory system.
Maintain firm pressure on the tarpon’s head to prevent its posterior from sinking, which could prove fatal. While reviving should be executed efficiently, don’t rush the process if the fish needs additional time to stabilize. It’s important to minimize both fight and handling duration, particularly in warm water conditions, as these factors markedly impact the tarpon’s post-release survival chances.
Photo Opportunities Without Harm
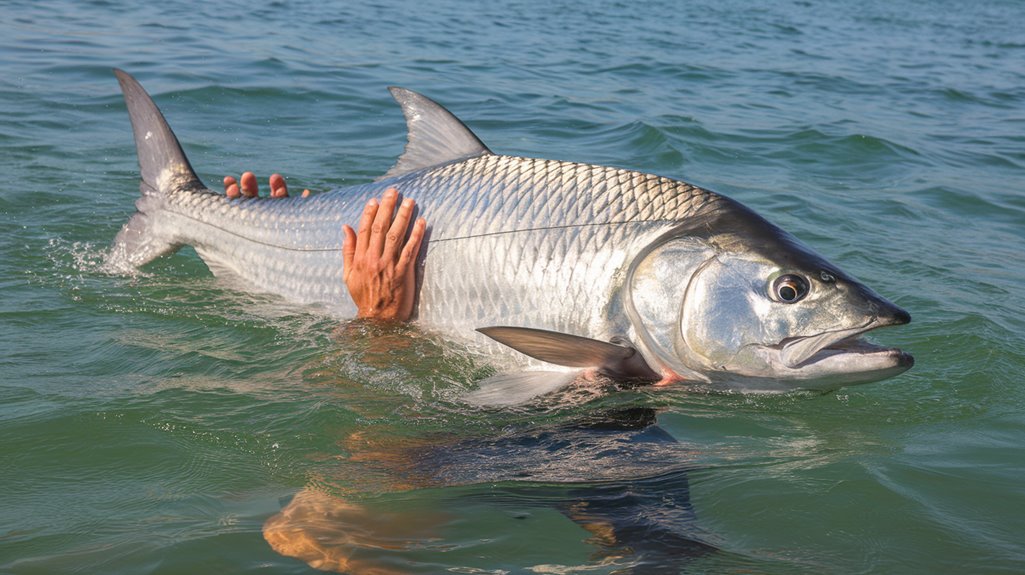
Before lifting the tarpon, you’ll need your camera ready and settings adjusted to minimize the fish’s time out of water. You should grip the tarpon’s lower jaw firmly while using your legs to support its weight, keeping at least half of its body submerged to protect its essential organs. Position the fish sideways with gills underwater for the best photographic silhouette while maintaining proper handling techniques that guarantee the tarpon’s survival.
Quick Camera Setup First
Since capturing memorable photos of your tarpon is a priority, preparing your camera equipment before landing the fish will minimize handling time and reduce stress on your catch. A quick camera setup guarantees you’re ready when the moment arrives, maximizing efficiency during the vital handling phase.
Follow these essential steps for peak photo preparation:
- Set your camera to wide-angle mode before the fish is landed, guaranteeing you’ll capture the tarpon’s full profile.
- Position yourself or a designated photographer with proper lighting and angle considerations.
- Pre-adjust your camera’s settings for water conditions and available light.
- Establish a clear plan with any assistants to coordinate handling the fish while maintaining proper jaw control.
This methodical approach allows you to document your catch while prioritizing the tarpon’s wellbeing through minimal air exposure.
Minimize Time Above Water
The single most essential factor in tarpon photography is keeping the fish’s air exposure to an absolute minimum. You’ll need to limit air exposure to just a few seconds while capturing your shots, ensuring the tarpon’s safety and survival.
| Action | Time Target |
|---|---|
| Photo Setup | Before lift |
| Air Exposure | 2-3 seconds |
| Hold Position | Horizontal |
| Return to Water | Immediate |
Support the tarpon horizontally with both hands, keeping its gills submerged whenever possible to prevent respiratory stress. Position the fish sideways to capture its iconic silhouette while maintaining stable support under its belly and head. Once you’ve secured your shots, immediately return the tarpon to the water, allowing it to recover naturally. Remember, minimizing time above water is vital for the tarpon’s post-release survival.
Support Fish Properly Positioned
Properly supporting a tarpon during photography requires precise hand positioning and careful control. To handle properly and support fish during photo opportunities, follow these specific techniques to minimize stress and prevent injury:
- Grasp the lower jaw with your hand facing downward, maintaining firm control while avoiding damage to the fish’s mouth structure.
- Place your right hand beneath the gill plate carefully, staying clear of the sensitive gill tissue while providing crucial support.
- Position the tarpon sideways for ideal photographic composition, keeping the majority of its body submerged to protect essential organs.
- Support the weight by lifting with your legs, ensuring only half the fish emerges from water.
Remember to work efficiently and return the tarpon to water quickly after capturing your photograph.
Shark Awareness and Safety Measures
While fighting and handling tarpon, you must remain vigilant for sharks that can pose serious risks to both you and your catch. Scan your surroundings continuously, as shark awareness is essential during the entire process. If you spot predators in the vicinity, quickly bring your tarpon closer to the boat to minimize its exposure and vulnerability.
When sharks appear during the fight, don’t hesitate to prioritize the tarpon’s survival by cutting the line near the hook. This decisive action gives the fish its best chance to escape predation. Remember that extended fight times greatly increase the risk of shark encounters, as exhausted tarpon become easy targets. You’ll need to balance proper handling techniques with the constant need to monitor for predatory threats, ensuring both your safety and the tarpon’s survival.
Seasonal Considerations for Release
Beyond shark awareness, understanding seasonal patterns proves vital for successful tarpon release. The timing of when you catch tarpon greatly impacts their survival rates, particularly during critical spawning months from April to July.
To handle the fish properly according to seasonal conditions:
- During late spring and summer, minimize fight time due to elevated water temperatures that increase stress levels
- In cooler months, focus on efficient revival techniques despite lower activity levels
- Avoid fishing during extreme weather events, as storms and high winds create additional survival risks
- Monitor local seasonal regulations, which may impose specific handling requirements during spawning periods
These temporal considerations directly affect post-release mortality rates, making it essential to adjust your catch-and-release practices based on seasonal factors and water conditions.
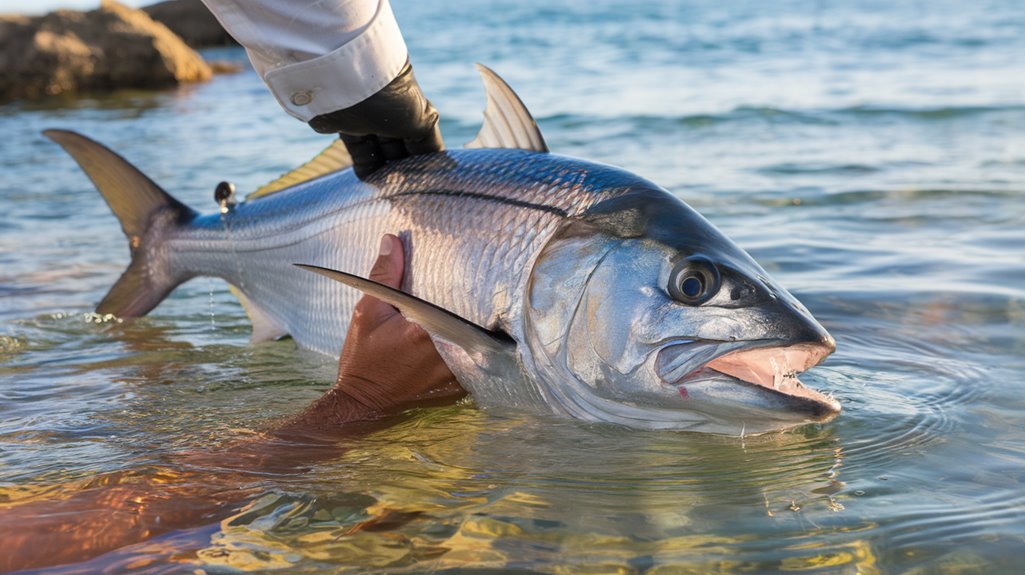
Size-Specific Handling Requirements
Since tarpon vary considerably in size from juveniles to giants exceeding 200 pounds, their handling requirements differ based on specific length measurements. For specimens over 40 inches, you must keep them in the water during the entire handling process unless you’re pursuing a record. If you’re handling smaller tarpon under 40 inches, wet your hands first and support them horizontally beneath their belly to protect their internal organs from damage. Regardless of size, you’ll need to guarantee their gills remain submerged to minimize stress and air exposure. Never drag any tarpon across the gunnel or hard surfaces, as this causes harmful abrasions. To handle properly and expedite release, use a long-handled dehooking tool, which allows you to remove hooks while keeping the fish in the water.
Location-Based Release Strategies
The specific location of your tarpon fishing directly impacts the release strategy you’ll need to employ. Different environments require distinct handling approaches to guarantee tarpon are handled properly and released safely.
- When fishing in Boca Grande Pass, you’ll need to avoid bottom-weighted jigs and breakaway gear, as these aren’t permitted in this protected location.
- In shark-active waters, quickly cut your line close to the hook if you spot a shark, giving the tarpon its best chance of escape.
- During spawning season (April-June) in any location, minimize fight and handling time to reduce stress on breeding fish.
- In warm-water areas, you’ll need to work quickly to release the tarpon, keeping fight times short and gills submerged to prevent oxygen depletion and guarantee survival.
Common Mistakes to Avoid
Making critical errors while handling tarpon can greatly reduce their survival rates and compromise conservation efforts. To properly handle and release these magnificent fish, you’ll need to avoid common mistakes that can prove fatal.
| Error to AvoidCorrect ActionRemoving from waterKeep tarpon in water for photosBare hand contactUse rubber gloves when handlingPulling main lineControl fish by leader onlyImproper release positionKeep head submerged during release |
|---|
When confronted with deeply-set hooks, don’t attempt removal. Instead, cut the line close to the hook to minimize stress. Remember to maintain the tarpon’s position during release by keeping its back end elevated, allowing proper swimming motion. Always handle the fish by the leader rather than the braided main line to prevent injuries to both you and the tarpon.
Frequently Asked Questions
How to Release a Tarpon?
Keep the tarpon’s head submerged while you’re releasing it, use rubber gloves to protect its skin, and if it’s lethargic, move it gently through water to stimulate breathing.
Why Are Tarpons Catch and Release Only?
While you might think tarpons are abundant, their slow growth and 50+ year lifespan make them vulnerable. You’ll protect their populations through catch-and-release, ensuring sustainable recreational fishing worth millions annually.
Why Can’t You Take a Tarpon Out of the Water?
You can’t remove large tarpon from water because it disrupts their respiratory function, damages their protective slime coating, and alters their electrolyte balance, considerably increasing their post-release mortality risk.
How Do You Fight a Tarpon?
Point your rod up when the tarpon jumps, drop it after. Keep steady pressure using the rod’s backbone. Use your hip for support, reel efficiently, and move forward if they swim underneath.
Conclusion
By following proper catch-and-release protocols, you’ll markedly increase tarpon survival rates from 85% to 97%, according to Florida Fish and Wildlife’s 2022 study. During the 2023 Boca Grande tournament, anglers who maintained sub-30-second air exposure and used barbless circle hooks reported zero post-release mortalities among 124 tagged fish. Remember, your handling decisions directly impact these magnificent gamefish’s survival and the sustainability of the fishery.